

Bucket Setup for Data Store
Before an analysis can be executed in FLAME, the required data must be made accessible through a configured data store. In this context, a bucket refers to a storage location, such as an S3 or SeaweedFS bucket, that contains the dataset to be analyzed. Creating a bucket is the first step in making data available to FLAME. The bucket will later be referenced by a data store configuration, which connects the FLAME project to the actual data.
The examples shown below use the included MinIO object store, but these steps can be applied to other S3 stores.
Migration to SeaweedFS+
As of v0.1.1 of the flame-node helm chart, SeaweedFS replaced MinIO as the included default S3 storage when dataStore is enabled.
Adding a User
Buckets can be restricted to specific users and users can furthermore have permissions set for managing the data. To add a user in SeaweedFS, click on "Users" in the sidebar and then on "Create User" in the top right of the window. Enter a username and (optionally) an email address for the new user, then assign them specific permissions and bucket access. Users with the "Admin (Full Access)" permission can modify and add anything they want. For executing analyses, the "Read" and "List" permissions are required.
Important
The user whose access and secret keys are used for the data store needs both the "List" and the "Read" permission on the bucket. "List" is required to find the files in the bucket, "Read" to retrieve their content. If one of them is missing, analyses cannot access the data.
Access and Secret Keys
When the user is created, they will have a pair of access and secret keys generated for them, and they will be shown on the screen. You should keep a record of these for later use. If the window disappears too quickly, you can view them again (or generate a new pair) by clicking on the key symbol in the Users overview table for that user.
Creating a Bucket
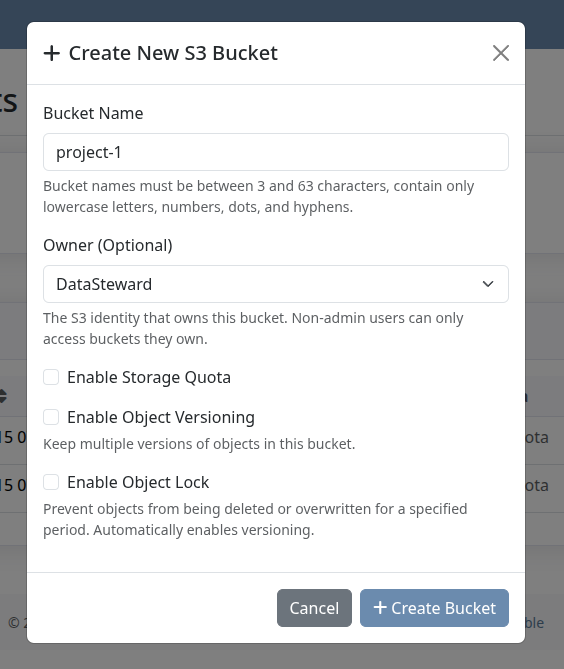
Buckets are where data for the analyses are stored. It is recommended that each project has its own bucket. To create a new one, click on "Buckets" in the sidebar and then on "Create Bucket" in the top right of the window. Give the bucket name (e.g. the project's name) and then optionally, assign an owner. If no owner is specified, only users with the "Admin (Full Access)" permission will be able to access or modify the data within the bucket.
Generating Access and Secret Keys
By default, S3 buckets are set to "Private", and accessing the data they contain requires the use of an access key and secret key. These keys are also required when creating a data store in the Node UI for this bucket. In SeaweedFS, only keys for users with the "Admin (Full Access)" permission or the bucket owner can access the data. Administrators and data stewards can generate a new key pair for these users by following these steps:
- Click on "Users" in the sidebar and then click on the key symbol for the user you want to generate a key pair for
- Click on "Create New Key" in the top right of the window
- Optionally, set the "Access Key" and "Secret Key" to your own specified values, or simply click on "Create" to auto-generate values for the keys
- Record the generated key pair
Uploading Data into a Bucket
To upload files or a directory into a bucket, navigate to "Buckets" in the sidebar and select the desired bucket. Click the "Upload" button in the top-right corner select one or multiple files from your local computer to upload.
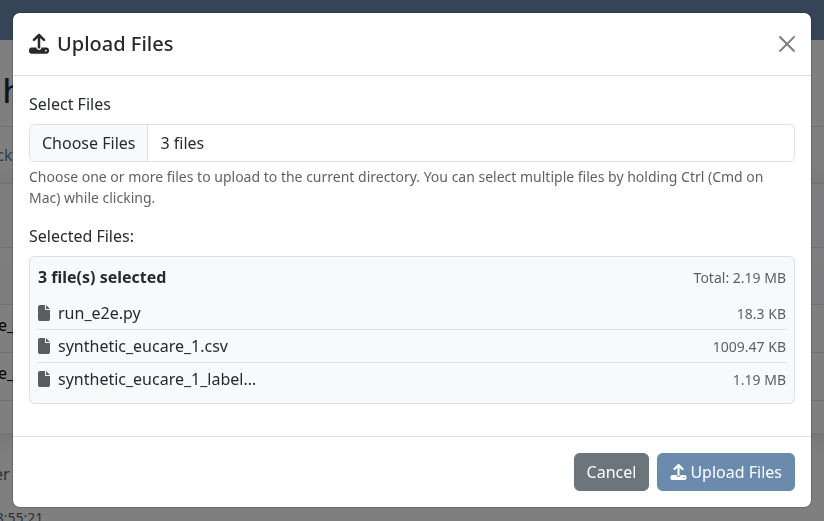
Click "Upload Files" to upload them into the bucket.
Deleting a Bucket
A bucket can only be deleted after all its contents have been removed. To do this, go to the "Buckets" tab in the sidebar, select the bucket you want to delete, and then click the red trashcan button in the bucket's row.
Integrate a Bucket in the Node
To make data from a bucket available for an analysis within FLAME, a corresponding data store must be created for the associated project that intends to use the data.
This process is explained in detail in the Creating a Data Store section. When configuring a data store for a bucket in the included SeaweedFS instance, the following parameters must be provided:
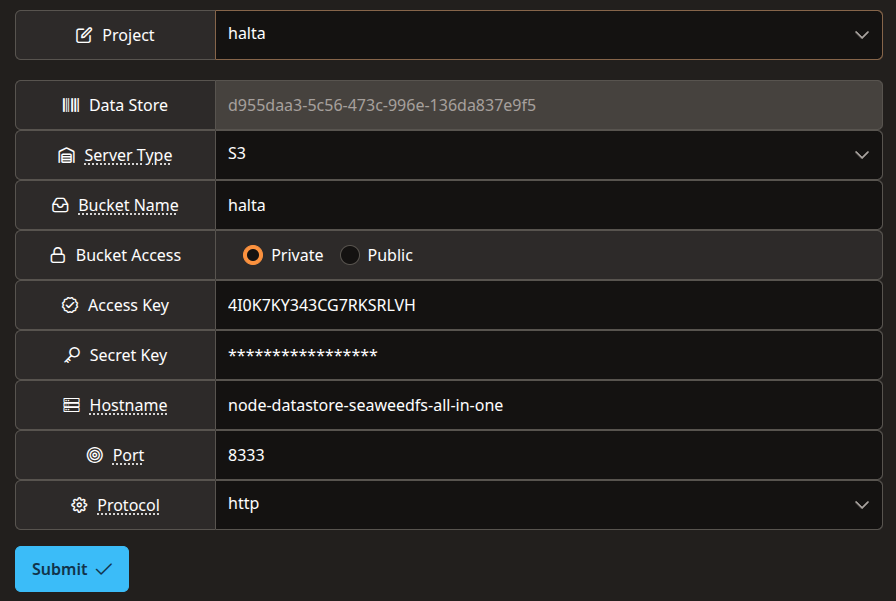
- Data Store Type:
S3 - Hostname:
node-datastore-seaweedfs-all-in-one - Bucket Name:
<bucket name> - Access Key: Generated access key for the listed, private S3 bucket
- Secret Key: Generated secret key for the listed, private S3 bucket
- Port:
8333
MinIO (Deprecated)
FLAME Node <0.0.10
As of flame-node v0.0.10, private buckets are supported and are set as the default. If you have flame-node <0.0.10 deployed, consider upgrading to the latest version, otherwise, only S3 buckets set to "Public" will work and any instructions on this page mentioning "keys" are not applicable.
Creating a Bucket
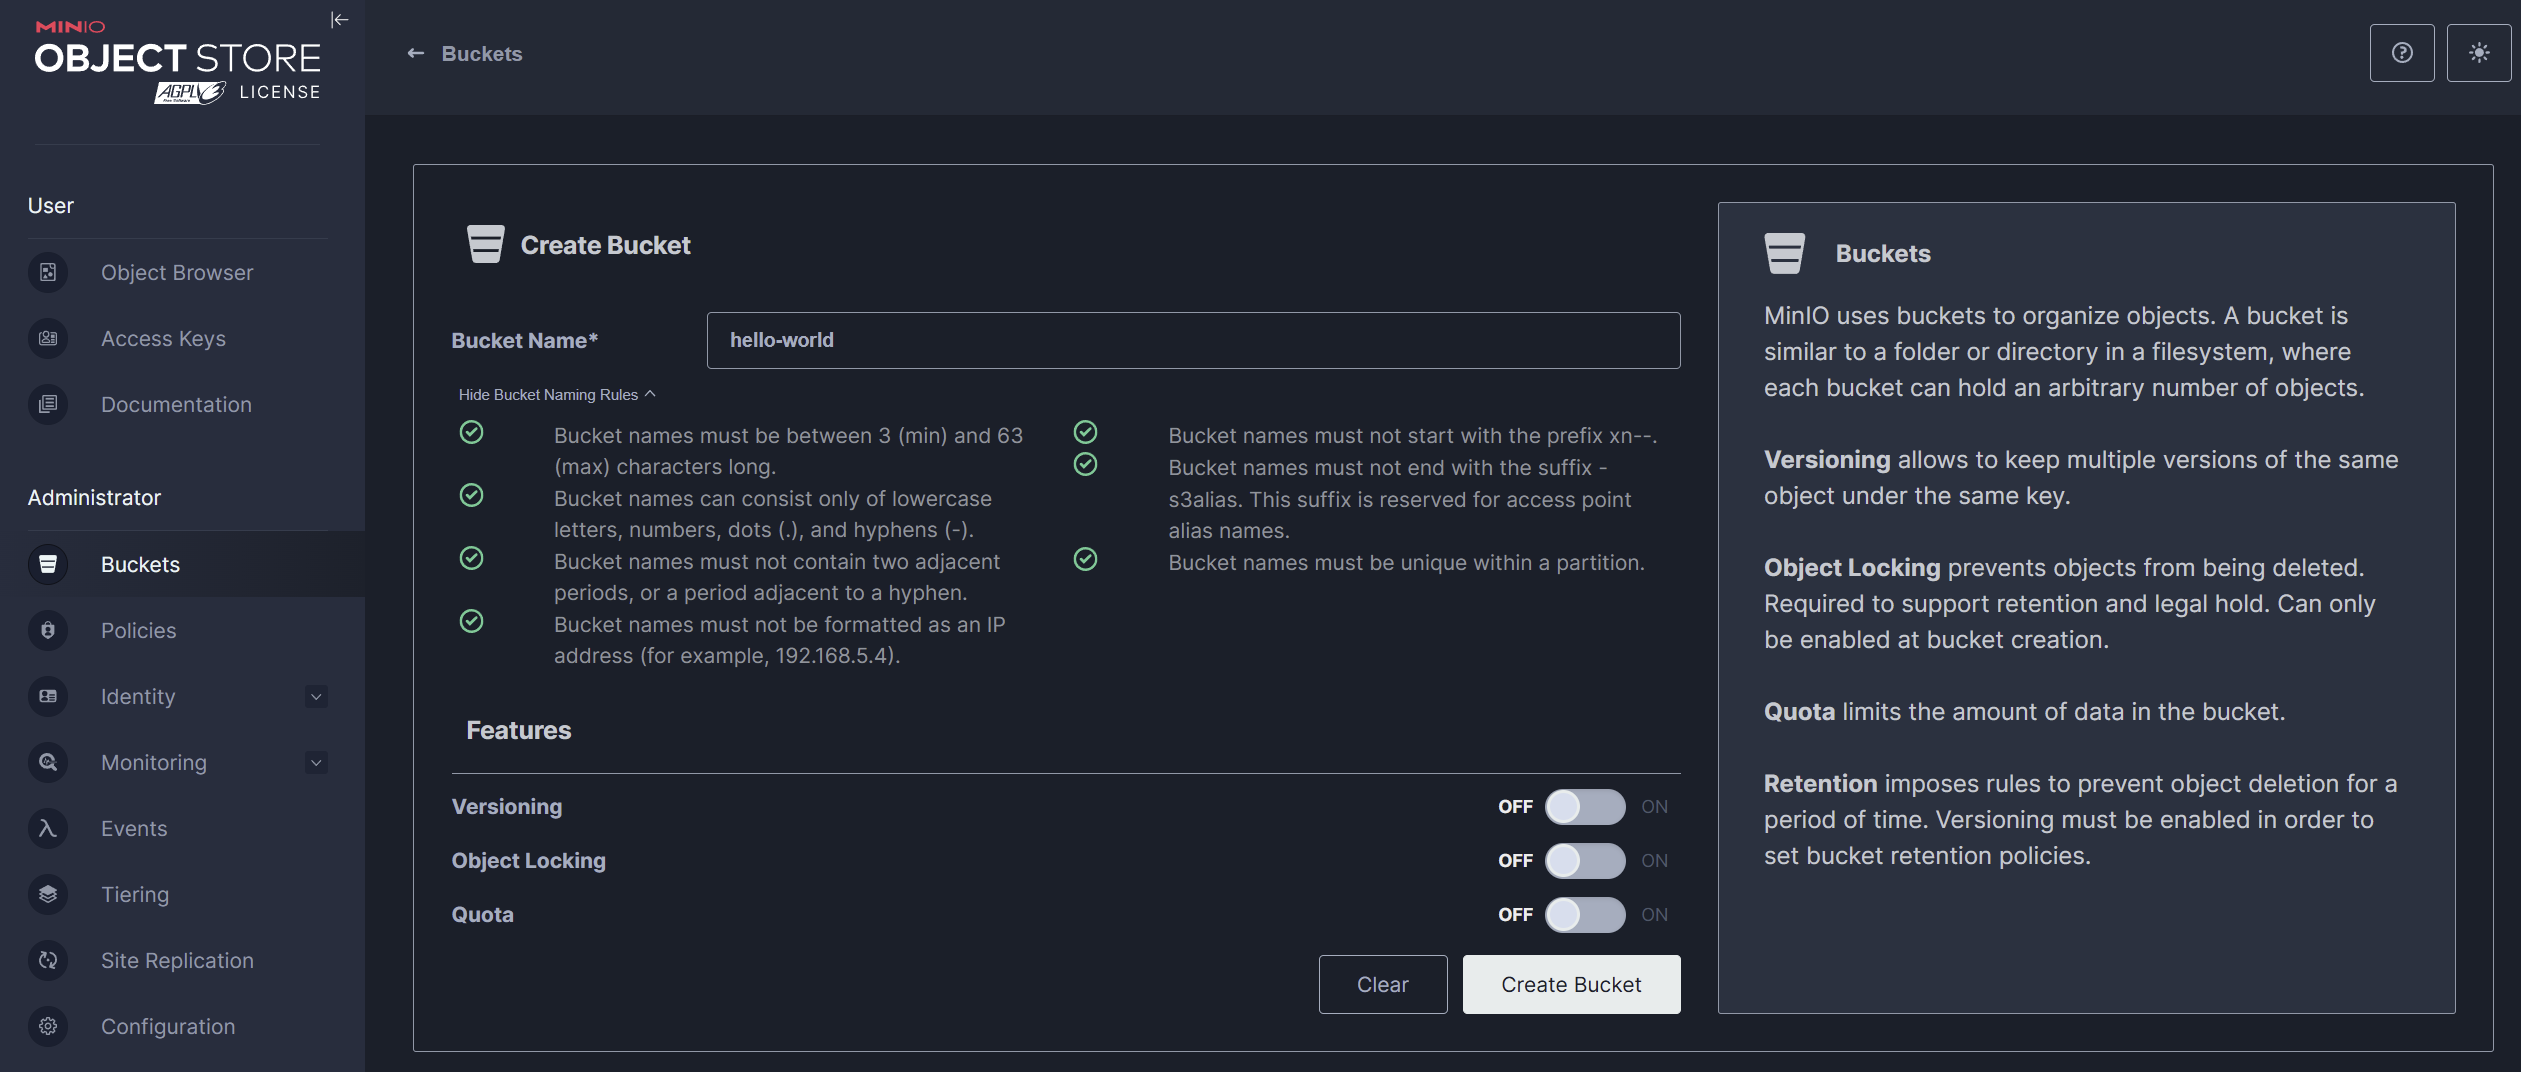
To create a new bucket, go to the "Buckets" tab in the Administrator Area on the left side of the page and click "Create Bucket". Give your bucket a name following the bucket naming rules, optionally select additional features, and click "Create Bucket" in the lower-right corner under the Features section.
Generating Access and Secret Keys
By default, S3 buckets are set to "Private", and accessing the data they contain requires the use of an access key and secret key. These keys are also required when creating a data store in the Node UI for this bucket. In MinIO, administrators and data stewards can generate a key pair by following these steps:
- Navigate to the "Access Keys" tab in the Administrator Area on the left side of the page
- Click the "Create access key" button in the top right corner of the page
- Enter any desired metadata including a name and expiration date for the keys
- It is recommended you enable the "Restrict beyond user policy" toggle and further limit the access key permissions. More details can be found in Modifying Access Key Permissions
- Click the "Create" button at the bottom
Save the Keys!
The secret key is only accessible during creation so it is important you record both keys now as you will need them when creating a data store
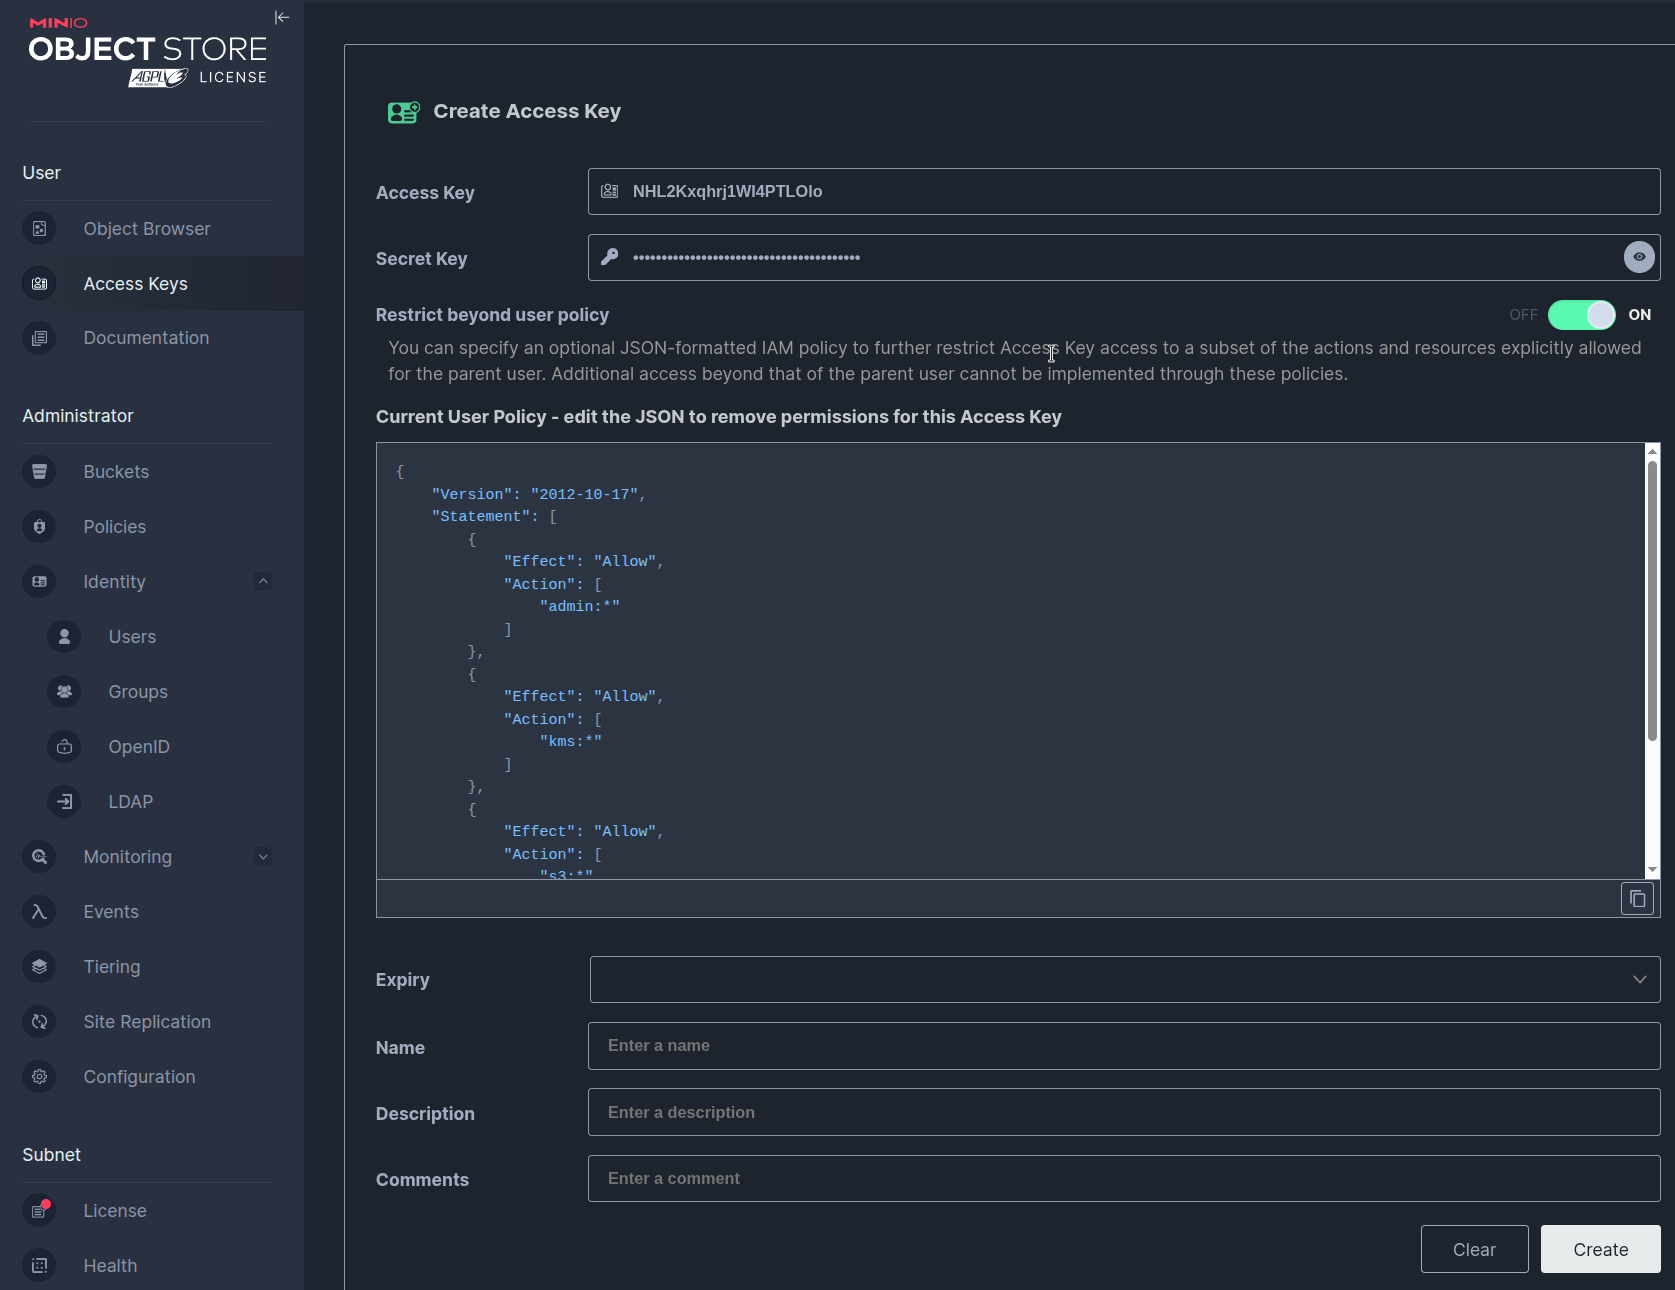
Modifying Access Key Permissions
Access keys have the same policies as the user who created them by default, however, it is advisable to limit the permissions of the access keys used for data store creation. FLAME analyses only require the following permissions:
- Bucket
s3:GetBucketLocations3:ListBucket
- Data
s3:GetObject
Thus, administrators and data stewards can use the following custom Access Key Policy (replacing <bucket name> with the name of the appropriate bucket) for additional security:
{
    "Version": "2012-10-17",
    "Statement": [
        {
            "Effect": "Allow",
            "Action": [
                "s3:GetBucketLocation",
                "s3:ListBucket"
            ],
            "Resource": [
                "arn:aws:s3:::<bucket name>"
            ]
        },
        {
            "Effect": "Allow",
            "Action": [
                "s3:GetObject"
            ],
            "Resource": [
                "arn:aws:s3:::<bucket name>/*"
            ]
        }
    ]
}
This policy can be applied either during access key creation or afterward by editing the access key settings.
Uploading Data into a Bucket
To upload files or a directory into a bucket, navigate to "Object Browser" in the User Area and select the desired bucket. Click the "Upload" button in the top-right corner and choose either "Upload File" or "Upload Folder". You can then select a file or folder from your local computer to upload.

If the upload starts successfully, a "Downloads/Uploads" tab will appear in the top-right corner, displaying the upload progress as a percentage.
Deleting a Bucket
A bucket can only be deleted after all its contents have been removed. To do this, go to the "Buckets" tab in the Administrator Area, select the bucket you want to delete, and then click the "Delete Bucket" button in the top-right corner.
Integrate a Bucket in the Node
To make data from a bucket available for analysis within FLAME, a corresponding data store must be created for the project that intends to use the data.
This process is explained in detail in the Creating a Data Store section. When configuring a data store for a MinIO or S3 bucket, the following parameters must be provided:
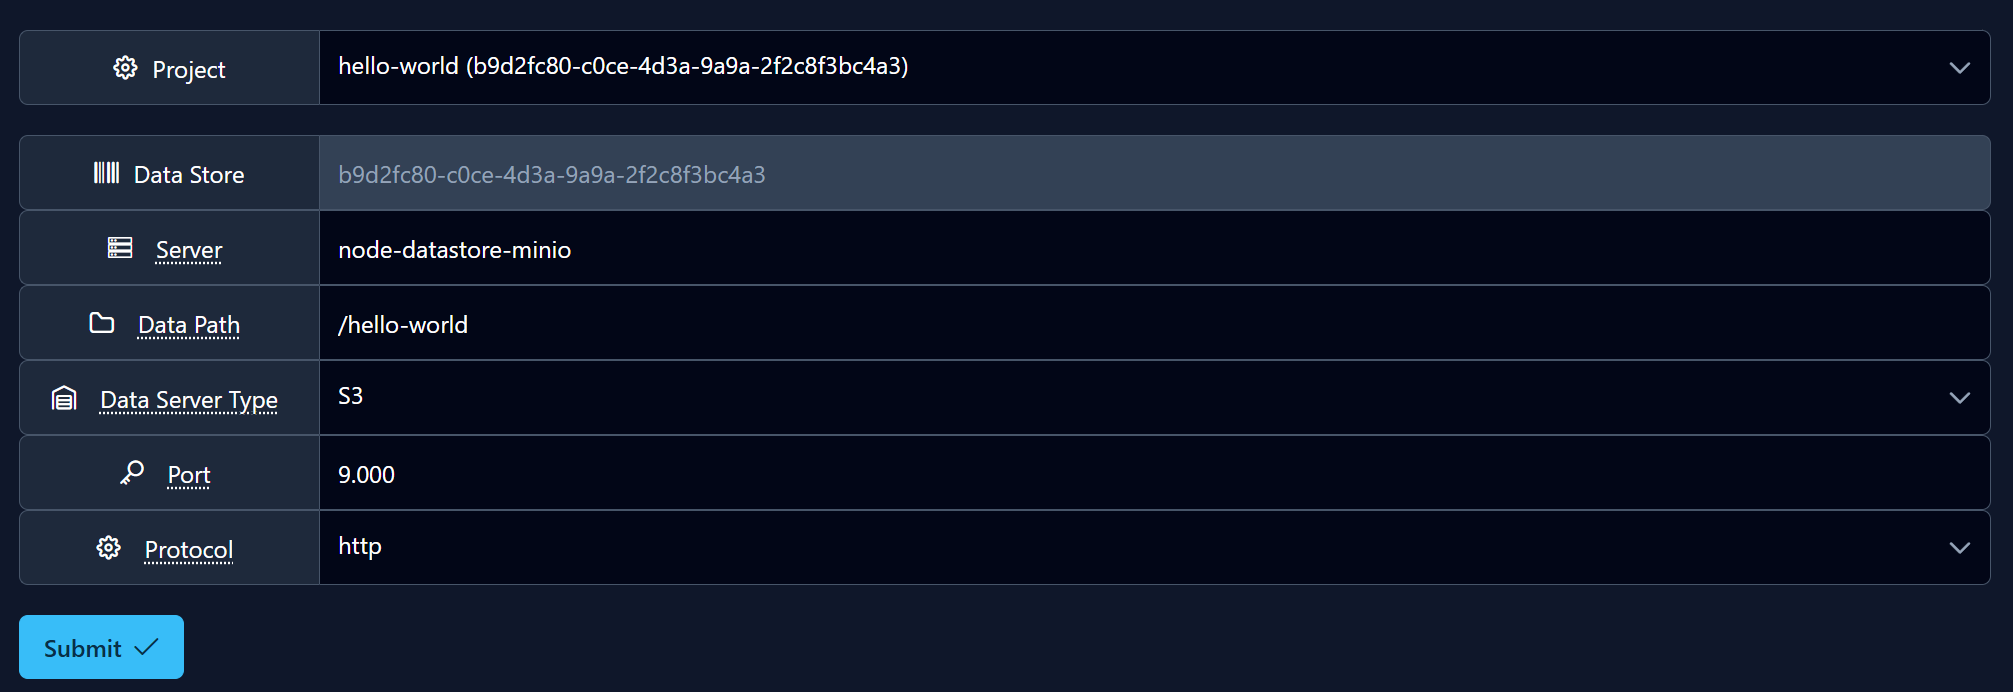
- Data Store Type:
S3 - Hostname:
node-datastore-minio - Bucket Name:
<bucket name> - Access Key: Generated access key for the listed, private S3 bucket
- Secret Key: Generated secret key for the listed, private S3 bucket
- Port:
9000