Keycloak & Admin Access Control
Node administrators control access to the local components using Keycloak as an identity provider by default. Keycloak is installed with the other necessary services during deployment and is used for authorization and authentication of both the admin and the other node services.
Setting the Default Login
During deployment, default credentials for the root user can be passed to Keycloak thus providing a username and password with which one can access the Keycloak console. To set these, simply modify the following default values found in thevalues.yaml or values_min.yaml file used during node deployment:
keycloak:
  auth:
    adminUser: myDefaultUser
    adminPassword: myDefaultPassword
Access Control
Initially, only one user can access the Node UI since only the root user is created in Keycloak during deployment. In order to create another user with the ability to sign in to the Node UI via Keycloak, navigate to the Keycloak console. This can be found by appending /keycloak to the end of the domain used for the Node UI e.g. "https://node1.privateaim.net/keycloak".
Creating a New User
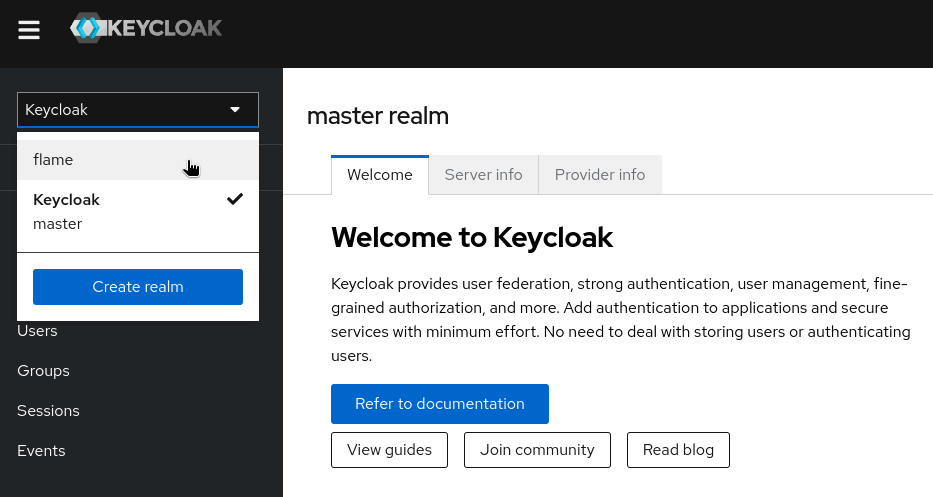
Login to Keycloak with the adminUser and adminPassword values used during deployment as described in the previous section. Once logged in, change the current realm to the "flame" realm:
Next, click on "Users" in the left sidebar, and then click on the blue "Add User" button in the middle of the window. Here, a new administrator can be created by performing the following steps:
- Because we must provide them with a temporary password to login, add "Update Password" to the list of "Required user actions". This will have them set their own password upon first login.
- Add a "Username" for the new administrator
- The email and name fields can be filled in if known, otherwise left blank
Your new user page should look similar to this:
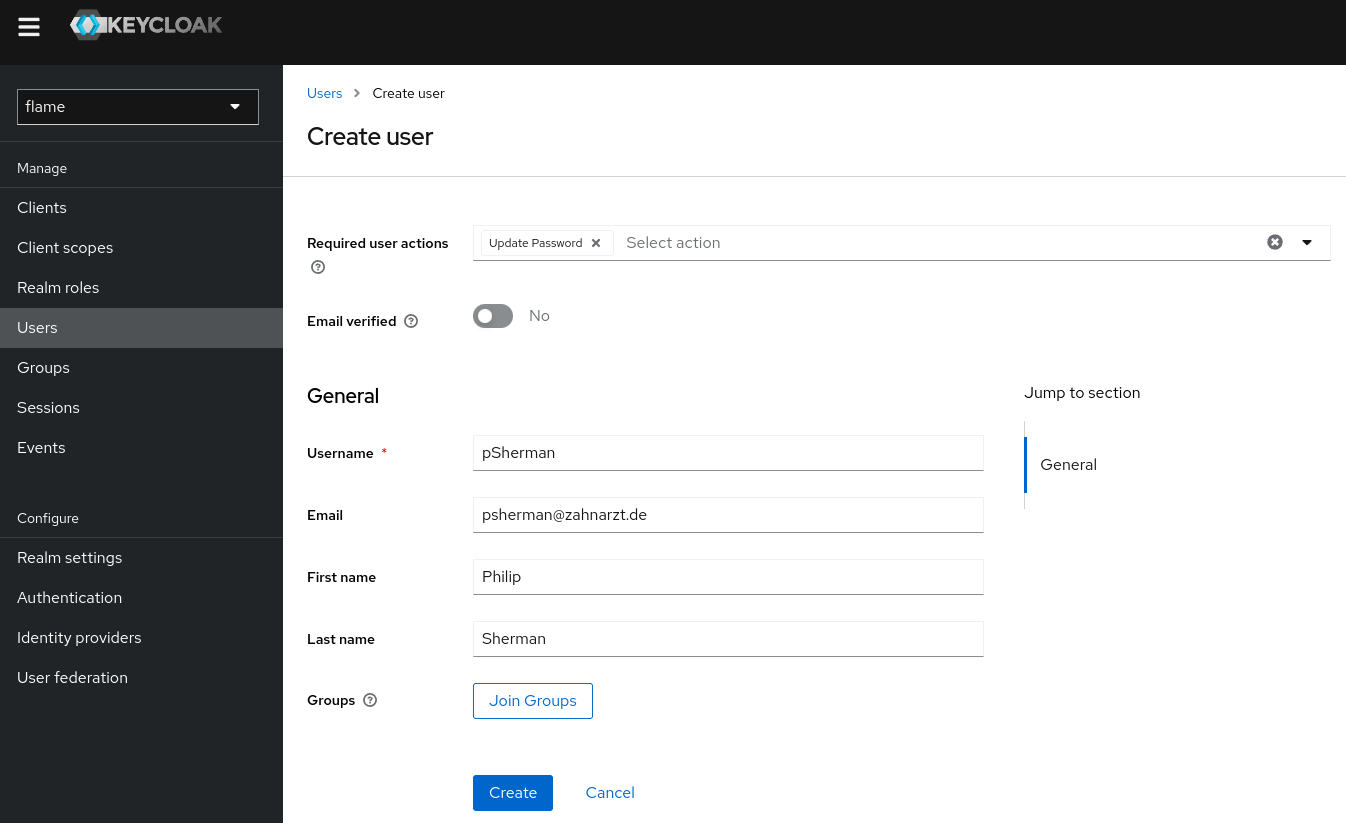
Click "Create" and the new user will be added, and you will be directed to the "Details" tab for the user.
Role Based Access Control (RBAC)
Admins may wish to grant certain individuals access to the Node UI, but restrict what they can do. The node software package allows for Node UI RBAC via the bundled Keycloak instance. Additioanl information on the roles and how to configure their names can be found in the Node Installation instructions.
Assigning Users a Role
Login to the administrative keycloak console and navigate to the "flame" realm. If you wish to create a new user, follow the steps in Creating a New User, otherwise, click on the user that you wish to assign a role. Navigate to the "Role Mapping" tab to view the current roles the user has (the default flameuser user should have the "admin" role) and click on the "Assign role" button and then on "Client roles".
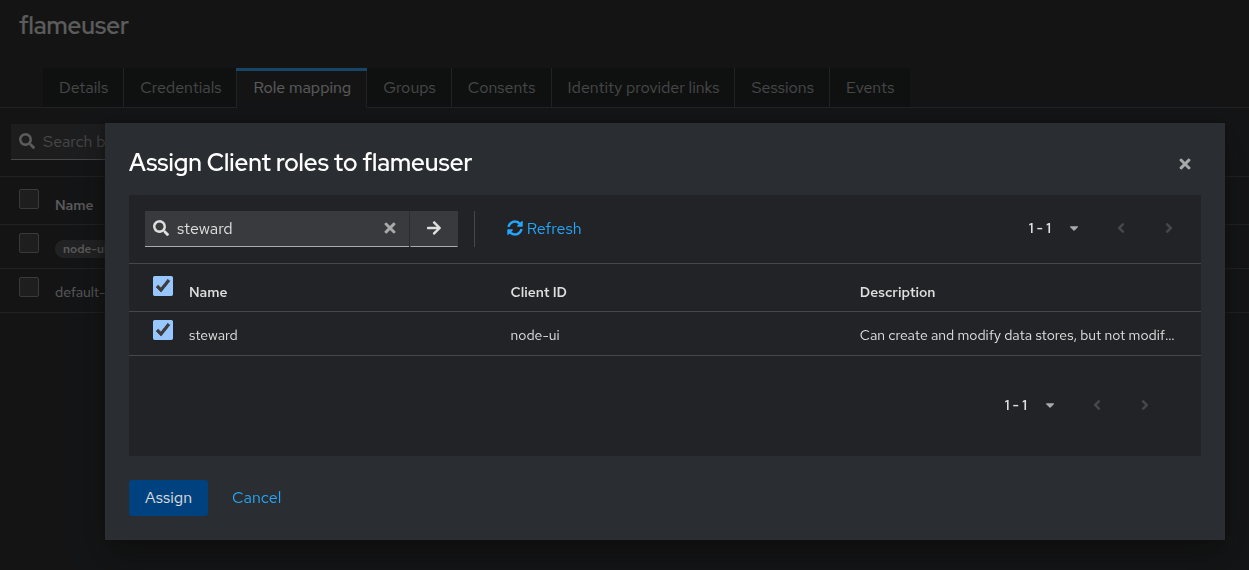
In the search box in the top left, search for role which you want to assign the user, either "admin", "researcher", or "steward". There should be a result with the role name that has a "Client ID" of "node-ui". Checkmark this result and click "Assign". The user now has this role and the permissions that come with it.
Role Names
If you modified the names of the roles during deployment in your values.yaml file, then you will see those names here instead.
Setting a Temporary Password
Finally, a temporary password must be set for the new administrator for their first login attempt. Click on the "Credentials" tab and then on the blue "Set password" button. Make sure the "Temporary" toggle is set to "On" and enter the same temporary password for the user in both of the fields on the screen.
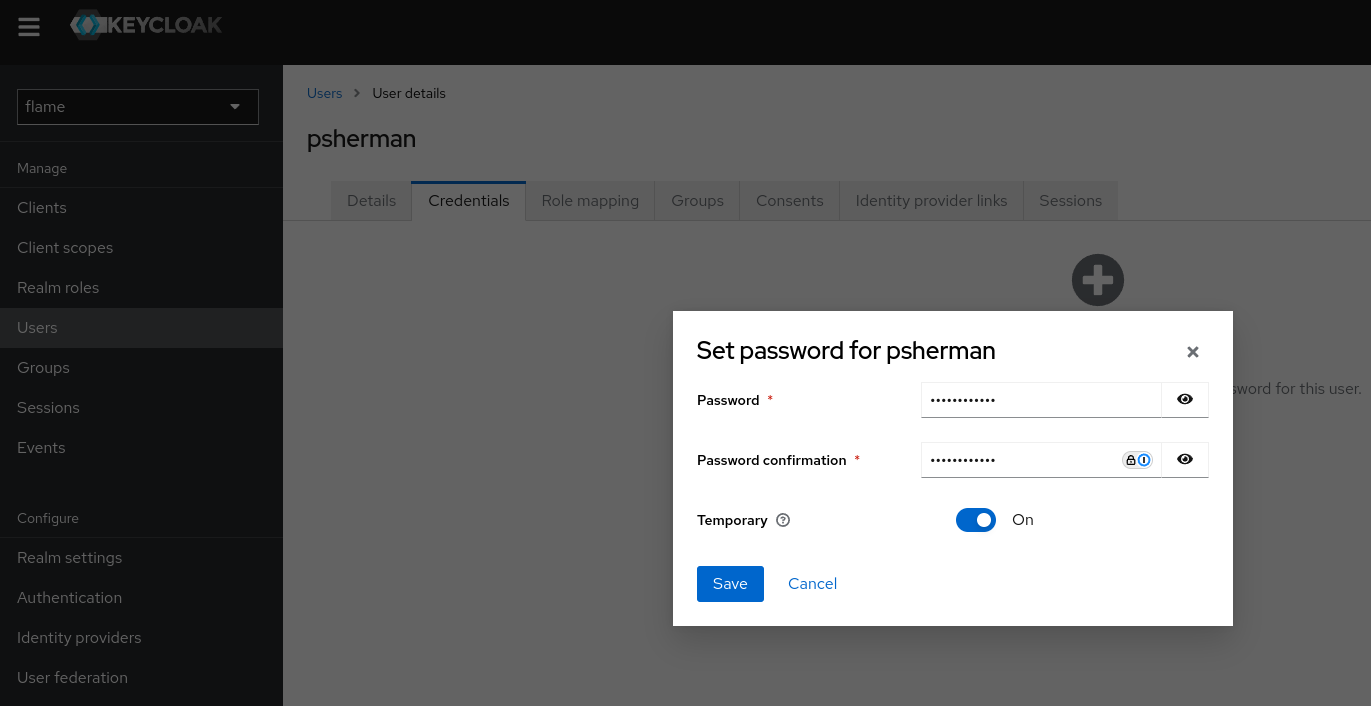
Click "Save" and now the username and temporary password can be given to the new administrator. When they first try to log in to the Node UI, they will be directed to create their own password and fill in any missing information such as their email and name. Once they complete that, the temporary password will be overwritten with the one they chose and they can from then on use their password and username to login to the Node UI as an administrator.
Unverified Email
New users may have red exclamation marks (!) next to their usernames when viewing the "Users" tab in Keycloak. This simply means their email hasn't been verified and will have no impact on their ability to log in to the Node UI.
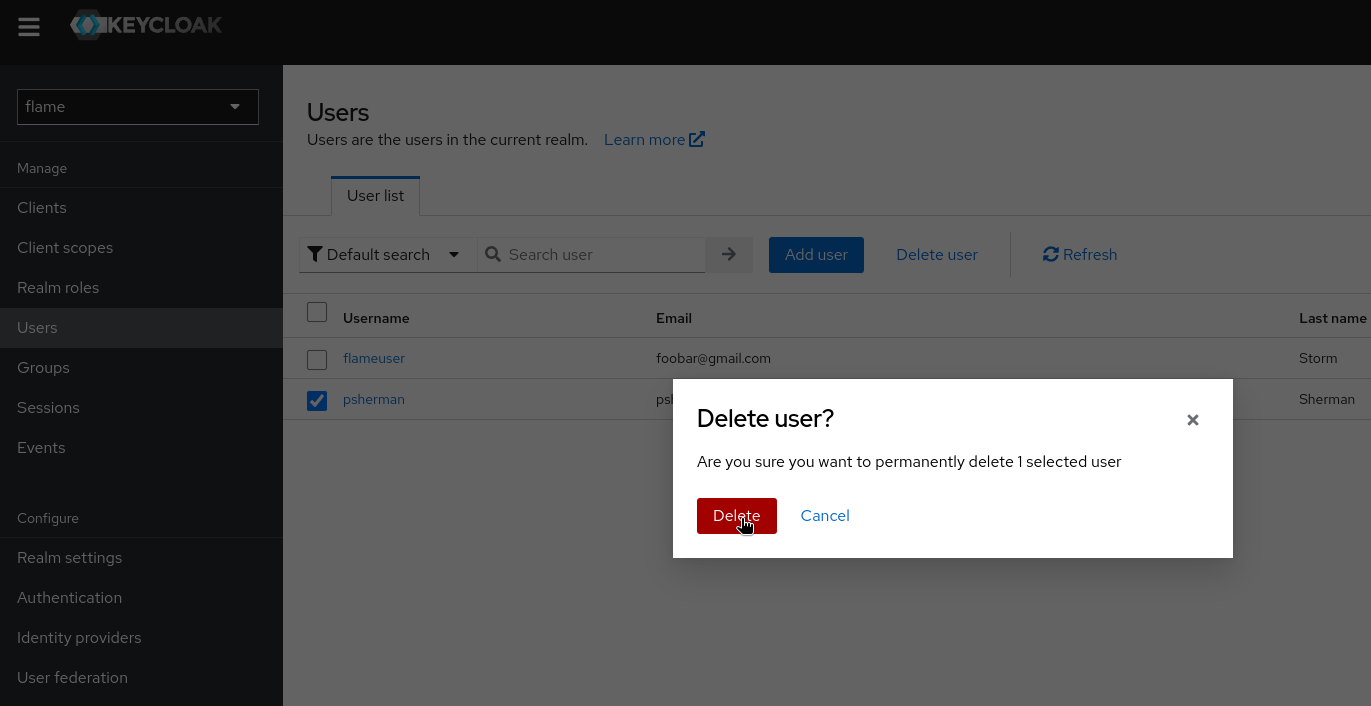
Deleting an Administrator
Should you wish to remove an administrator's access to the Node UI, deleting their user account in Keycloak is quite easy. Make sure you are in the "flame" realm as shown in the top right of the Keycloak console page and navigate to the "Users" tab in the left sidebar. Select the user by clicking the box to the left of their username and then click "Delete user", and confirm by clicking the red "Delete" button. The user will no longer be able to log in to the Node UI once this is completed.
Using a Different IDP
Admins can configure the FLAME software to use a separate IDP (i.e. different Keycloak instance), which is incredibly useful when you already have an instance with your users and roles configured. This needs to be done during installation and instructions on how to achieve this can be found here.