FLAME Node Deployment
This section will provide instructions for deploying the FLAME node software on your server.
These instructions assume that you have done the following:
- Node has been registered in the Hub UI
- Credentials for your node's client were generated and saved
- A keypair was generated and the private key was saved as
private_key.pem
Requirements
Hardware
- 8 cores
- 16GB (minimum) - 32GB (recommended) RAM
- 100GB storage
Networking
- Ports 22 and 443 are open
- Access to the internet for communicating with the Hub
- A hostname that directs to the server running the FLAME Node software
Software
TIP
A quick start guide to installing microk8s and Helm can be found here.
Kubernetes
Kubernetes (also known as k8s) is a container management software package which allows for rapid deployment and scaling of multiple applications and service. There are multiple distributions of k8s available for a variety of system configurations. The only requirement for the FLAME Node software is that a network plugin (e.g. Calico) is installed in your k8s installation to allow for network policy management. Additionally, the DNS provider in your cluster must use the standard k8s-app: kube-dns label on its pods (e.g. CoreDNS or kube-dns deployed via kubeadm). This label is required so that analysis pods can resolve internal service names through the cluster DNS. Most standard Kubernetes distributions — including microk8s, kubeadm, EKS, GKE, AKS, and k3s — use this label by default. You can verify this with:
kubectl get pods -n kube-system -l k8s-app=kube-dnsIf this returns no pods, your DNS provider uses a non-standard label and network policy enforcement for analysis pods will not work correctly.The following distributions have been tested for use with the Node software:
Helm
The FLAME Node software package is a compilation of multiple services working together which require several configuration parameters to be properly set during installation. Helm is k8s application management tool that simplifies deploying complex software. It enables one to easily install, update, or rollback multi-service software and we highly recommend using this tool for installing the FLAME Node. See the Helm website for instructions on how to install Helm on your system.
Preparation
In order to deploy a node, you will need the following pieces of information from the Hub:
- Client ID
- Client Secret (not hashed!)
- Private Key
With this information, you can provide the required Helm configuration values in two ways:
If you are using the GitHub repository, a sample values.yaml file is included in the charts/flame-node/ directory. It can be edited as needed. Alternatively, you may create a new values.yaml file.
If you are installing via the Helm repository, you need to create your own values.yaml file (e.g. my-values.yaml). This file is not provided automatically and can be stored anywhere locally. It is passed to Helm using the -f option.
Here is a minimal example of a values.yaml file:
expose:
    type: "ingress"
    hostname: https://your.node.ui.domain.com

hub:
    auth:
        clientId: <Client ID>
        clientSecret: <Client Secret>
    crypto:
        privateKey: |
            -----BEGIN PRIVATE KEY-----
            myExamplePrivateKey
            -----END PRIVATE KEY-----
Be sure to set the expose.type to either "ingress" or "gateway" in your values file, otherwise, your hostname will not resolve.
The crypto private key can also be provided using an existing secret. For more information on how to do this, see Using an Existing Secret for the Crypto Private Key.
Note
The default installation method assumes that if you have SSL enabled (i.e. using HTTPS), then this is handled by a reverse proxy. If this is not the case, you need to disable the proxy headers for keycloak like shown in this example.
Routing
Most kubernetes distributions previously used only the Ingress API for routing traffic, but that has been recently deprecated in favor of the new Gateway API. Currently, our helm charts are designed to support both APIs, but the user must choose one of the APIs to use when deploying the helm chart. We suggest using "ingress" if you are unsure.
Though the Gateway API is the currently accepted standard and recommended API to use, it is not automatically included in all kubernetes distributions. Users should follow this guide for installing the Gateway API if they haven't done so already and wish to use this API.
If you are not sure whether this API is already installed in your kubernetes installation, run the following commands:
kubectl get crd gateways.gateway.networking.k8s.io
kubectl get crd httproutes.gateway.networking.k8s.io
If either command gives an error or returns NotFound/Unhandled Error, then they are not installed and you cannot use the "gateway" option for .expose.type.
Keycloak
By default, the FLAME Node package deploys keycloak as part of the installation. The clients and their secrets are all generated and configured within this included IDP. If you wish to use your own IDP, then a client for the Node UI will have to be created and its secrets set in the values template. See the Using Your Own IDP section for more information.
Role Based Access Control (RBAC)
The node software package supports restricting the actions of certain users with access to the Node UI via RBAC. A user can have one of three roles with the following names and permissions:
- steward: can modify/create data stores, but cannot start/stop/delete analyses or view their logs
- researcher: can start/stop/delete analyses and view their logs, but cannot modify data stores
- admin: full access
The included Keycloak instance includes these roles by default, and the initially created flameuser is given the " admin" role. The names of these roles can be modified in your my-values.yaml, and these changes will be reflected in Keycloak as well:
rbac:
    roleClaimName: "resource_access.node-ui.roles"
    adminRole: "admin"
    stewardRole: "steward"
    researcherRole: "researcher"
Role Claim Name
The roleClaimName value is specific for how the role is defined in the JWT provided by the bundled Keycloak, and should not be modified. This only ever needs to be changed if you are using your own IDP.
See the Access Control section of the documentation for more information on how to create users and assign them specific roles.
Disabling RBAC
If you have no need for RBAC, it can be disabled by setting roleClaimName to an empty string ("").
Using Your Own IDP
For better security, this software uses Keycloak for authenticating the various services and users that make up FLAME. Keycloak is installed along with the other services and is required for the creation and management of the individual analyses. Using the keycloak console, the admin you can add additional users who can access the FLAME UI, but you may also use your own IDP for user authentication. Here are the values that need to be filled in to achieve this:
userIdp:
    ## @param userIdp.hostname Hostname for a separate IDP to manage users who can access the FLAME Node UI.
    ## The URL provided should be the issuer URL of the IDP.
    ## Leave this blank unless you want to use your own IDP for user authentication
    hostname: https://my.own.keycloak.instance.de/realms/myRealm
    ## @param userIdp.provider User auth provider. Can be 'keycloak', 'auth0', 'authentik', 'onelogin', 'okta', 'zitadel', or 'hub'
    provider: keycloak

ui:
    idp:
        clientId: <Client ID for Node UI>
        clientSecret: <Client Secret for Node UI>
To enable this, first you must create individual clients for the Node UI in your IDP. Be sure to enable client authentication and take note of the client ID and secret for this new client as this information along with the (accessible) URL for your IDP must be provided in your my-values.yaml. You may also need to set the hostname you are using for your node as a valid redirect URI in the client settings. An example of how to configure this in for your cluster can be seen in this separate IDP example.
RBAC
Admins using their own IDP who also wish to utilize RBAC for the Node UI will need to configure the roles using their IDP's documentation. Once a the role is created and assigned to a user, the roleClaimName value needs to be modified so that the role can be extracted from the JWT provided by the IDP. The roleClaimName value should contain the keys leading to the role value in the decrypted JWT, with each hierarchical level separated by a period (".").
In this example:
{
    "sub": "1234567890",
    "name": "John Doe",
    "iat": 1516239022,
    "access_control": {
        "node-ui-client": {
            "user-defined-roles": [
                "steward"
            ]
        }
    },
    "scope": "openid email profile",
    "email_verified": true
}
the roleClaimName should be changed to "access_control.node-ui-client.user-defined-roles".
Installation
At this point, you should have a custom values file (e.g. my-values.yaml) which contains the client credentials and private key for your node. If you have all of this information, then you can proceed with deploying the FLAME Node by either using the FLAME repo OR cloning the Github repository.
Note
The Helm release name flame-node is used in the following examples, but any release name can be used in place of it.
Using the FLAME repo
The FLAME helm repository can be added to your list of available repos and then used to deploy the node software. First, add the FLAME repo:
helm repo add flame https://PrivateAIM.github.io/helmDeploy the FLAME Node using your values file
helm install flame-node -f my-values.yaml flame/flame-nodeUsing the GitHub Repository
Users can clone the FLAME Node Helm charts by cloning the helm repository from GitHub. The charts/flame-node/ directory contains the parent helm chart used for the deployment.
git clone https://github.com/PrivateAIM/helm.gitNavigate to the FLAME Node helm chart directory and compile its sub-charts:
cd helm/charts/flame-node/
helm dependency build
Then you can deploy the FLAME Node using this local helm chart:
helm install flame-node -f my-values.yaml .Startup Time
Several services are deployed as part of this Helm chart and some need to execute initialization containers in order to properly import the configuration. This can cause the helm install to hang for a few minutes while everything is deployed and verified, so please have patience during this step and do not prematurely cancel the command.
Proxies
If your server is behind a proxy i.e. all traffic is routed through a specific address and/or port, then the FLAME Node needs to be configured to use the same proxy for its requests.
An easy way to tell if a proxy is configured on your machine is to run echo $HTTP_PROXY or check the /etc/environment file while logged into the server. If any of the HTTP_PROXY, HTTPS_PROXY, http_proxy, or https_proxy variables are populated, then the machine is likely behind a proxy and this address needs to be added to the my-values.yaml file as shown here:
expose:
    type: "ingress"
    hostname: https://your.node.ui.domain.com

hub:
    auth:
        clientId: <Client ID>
        clientSecret: <Client Secret>
    crypto:
        privateKey: |
            -----BEGIN PRIVATE KEY-----
            myExamplePrivateKey
            -----END PRIVATE KEY-----

proxy:
    httpProxy: "http://my.example.proxy.de:3128"
    httpsProxy: "http://my.example.proxy.de:3128"
    noProxy: "10.0.0.0/8,192.168.0.0/16,127.0.0.1,172.16.0.0/16,.svc,localhost,.cluster.local"
The NO_PROXY/no_proxy value will depend on your kubernetes distribution and your server configuration, please check your kubernetes distribution's documentation for suggested values. It is highly recommended that you add the the DNS A record to the noProxy value for the cluster in which you are deploying the FLAME Node. The name for this record takes the form of <cluster-domain> and by default is equal to .cluster.local.
Additional Certificate Authority (CA) Certificates
Some locations may have additional, self-signed SSL/TLS certificates that they use for monitoring web traffic on their servers. In this case, problems can occur that pre-mature SSL termination occurs and the node services cannot communicate with the Hub. To avoid this, these self-signed CA certificates need to be provided to the node during deployment. This can be done by providing the CA files either:
- In the
helm/charts/flame-node/certsdirectory and installing using a local version of the helm chart - Using a pre-defined kubernetes ConfigMap that provides the information under a key labeled
certs.pem
Using the certs Directory
By cloning the helm repository, one can provide the CA PEM files in the helm/charts/flame-node/certs directory and then perform a helm install using the modified local helm chart, and the files will automatically be imported as a ConfigMap and provided to the necessary services. The CA certificates need to be in PEM format (i.e. *.pem) and ideally, they are all concatenated into a single file. If there are multiple files, place them all (in order) in the certs/ folder, and the deployment will automatically concatenate them for you. In the example below, a user copies their institution's self-signed CA certificate into the certs/ directory and names it myCA.pem
├── CHANGELOG.md
├── charts
│   ├── flame-node
│   │   ├── 0_setup.sh
│   │   ├── certs
│   │   │   └── myCA.pem  <-- Custom CA file
│   │   ├── Chart.lock
│   │   ├── charts
│   │   ├── Chart.yaml
│   │   ├── flame-node-data-store
│   │   ├── templates
│   │   ├── values_min.yaml
│   │   ├── values_test.yaml
│   │   └── values.yaml
│   └── third-party
└── README.md
Using a Pre-Defined ConfigMap
Similar to how one can create a kubernetes Secret and provide that to the values.yaml, one can also create a custom ConfigMap containing the certificate and use that instead. The certificate must be named certs.pem and if you have multiple self-signed certificates to provide, they must all be concatenated into that one file.
Now, create your custom ConfigMap (in this example it is named my-certs) using that file:
kubectl create configmap my-certs --from-file=/path/to/certs.pemThen must edit your my-values.yaml to include this new ConfigMap name:
certificateConfigMap: "my-certs"Your my-values.yaml can then be used during deployment to provide the certificates.
Storage Class Definitions
Because several services in this helm chart need to store long-term data, they will request storage space via a persistent volume claim (PVC) using the default storage class defined in your kubernetes cluster. If you want to specify which storage class these services use (e.g. longhorn), here is a minimal example for your my-values.yaml file:
# Shared node service database
postgresql:
  storage:
    className: longhorn

# Kong gateway database
kong-postgresql:
  storage:
    className: longhorn

# Keycloak database
keycloak-postgresql:
  storage:
    className: longhorn

# Message broker database
mongodb:
  storage:
    className: longhorn

# S3 object store backing the storage service
seaweedfs:
  allInOne:
    data:
      storageClass: longhorn

# Log storage (only rendered when victorialogs.enabled: true)
victorialogs:
  server:
    persistentVolume:
      storageClassName: longhorn


# The following are only when dataStore.enabled: true
dataStore:
  enabled: true
  # Blaze FHIR store
  blaze:
    persistence:
      storageClassName: longhorn

  # Dummy S3 store
  seaweedfs:
    allInOne:
      data:
        storageClass: longhorn
Creating a Storage Class
There are multiple reasons why you may want to create a new storage class in your kubernetes cluster such as delineating fast (SSD) vs slow (HDD) storage pools, different provisioners or binding modes, or for implementing encryption. For more information on how to set up a specialized storage class on your cluster, see the official kubernetes documentation
Deploying without a Domain Name
It is highly recommended to deploy the FLAME Node using a domain or hostname that is configured within your institution's DNS or proxy. However, there may be circumstances in which you want to deploy the software without providing an accessible domain or hostname. In such cases, thee are a couple of options for configuring the FLAME Node such that you can still access the Node UI.
- Those with access to the server running the services can port forward the individual containers for each of the services and access them in their browser using the forwarded ports
- On one or multiple machines, manually map the IP address of the FLAME Node server to a hostname
Port Forward
Disable Routing
When deploying the FLAME node without a hostname, the values file must be configured to disable routing for the services:
expose:
    type: "none"
    hostname:

hub:
    auth:
        clientId: <Client ID>
        clientSecret: <Client Secret>
    crypto:
        privateKey: |
            -----BEGIN PRIVATE KEY-----
            myExamplePrivateKey
            -----END PRIVATE KEY-----
Be sure to still populate the clientID and clientSecret with the credentials obtained from the Hub as well as the private key for the result service.
Accessing the Services
Once you have deployed the FLAME Node with routing disabled, three services need to be port-forwarded:
- Node UI
- Hub Adapter
- Keycloak
Get the Service Names
Depending on what the helm deployment was named, the service names will vary. In our example above, we used flame-node for the release name so each of the services will have this as a prefix.
Get a list of currently running services (and their names) with
kubectl get svc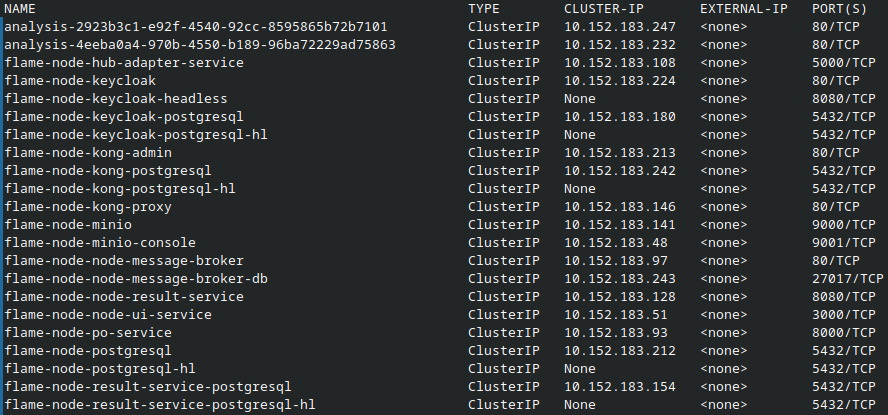
Port Forward the Services
Using the names obtained in the previous section, we can forward the ports these services are using to the same ports on our local machine:
kubectl port-forward svc/flame-node-node-ui-service 3000:3000 & \
kubectl port-forward svc/flame-node-hub-adapter-service 5000:5000 & \
kubectl port-forward svc/flame-node-keycloak 8080:80
Now you can access these services in your browser. For example, to access the Node UI, open a browser and navigate to http://localhost:3000.
Map a Hostname
It is possible to override a DNS entry by manually mapping an IP address to a hostname or URL in your local hosts file. On Unix systems, this file is often located at /etc/hosts and it Windows it can be found at C:\windows\system32\drivers\etc\hosts. If you choose to do this, only the machines with this manual configuration will be able to access the Node UI.
Enable Offline Mode
Because the provided hostname is only resolvable on those machines for which the hostname and IP were manually mapped to one another, the k8s cluster will not be able to find the other services using this name. Thus, when deploying the FLAME Node in this manner, the Node UI and Hub Adapter must have offline set to true in their configurations so that they can still communicate with the included keycloak instance for client authentication.
Other settings can be left as though a FQDN is being used including enabling routing and providing the locally resolvable hostname. Your my-values.yaml should look similar to this:
expose:
    type: "ingress"
    hostname: http://your.locally.resolvable.hostname

hub:
    auth:
        clientId: <Client ID>
        clientSecret: <Client Secret>
    crypto:
        privateKey: |
            -----BEGIN PRIVATE KEY-----
            myExamplePrivateKey
            -----END PRIVATE KEY-----

offline: true
(Optional) Node Data Store
The flame-node helm chart includes the flame-node-data-store subchart which can be used to deploy a FHIR server ( blaze) and/or an S3 server (SeaweedFS) in addition to the node software components. These servers can store data that can be used for running analyses. Ideally, these are used only for development and testing purposes.
You can enable these services through your my-values.yaml file:
dataStore:
  enabled: true
  seaweedfs:
    admin:
      secret:
        adminUser: "<username>"
        adminPassword: "<password>"